How To Prep For Paint?
If you want to refresh your space with new paint, start with good preparation. Getting your surfaces ready can really improve how the paint looks in the end and help it last longer. Here you will walk through some essential tips and tricks on how to prep for paint like a pro. Prepping for paint is a tricky task to achieve a smooth yet professional look. So, Let’s jump in and get some super-duper fun and easy ideas for a beautiful transformation of your house!
How To Prep For Paint? A Step-By-Step Guide
Clear the Area:
Move your furniture (side tables, coffee tables), all the decorations, sofas, wall hangings, frames, and any other items from your room. If you can move all the furniture out it will be a great thing but if not then only moving will help too. This will create an ample space to work and keep your belongings safe from paint stains. Moving the expensive wall hangings and photo frames will make it much easier to paint around your windows and frames without the risk of paint damage.
Clean and Prepare Your Walls:
Cleaning your walls and woodwork before painting will make a significant change to the result, which is why considering “House Interior Painting Services” can be a game-changer. Clean off all the dirt, dust, and grease from the walls. Use a liquid detergent and warm water to clean the dirt from the walls, ceilings, and other surfaces you wish to paint. Before you start painting, rinse off thoroughly and let it dry completely. Opting for professional House Interior Painting Services ensures that the preparation and painting process is handled expertly, leading to a flawless finish.
Protect The Surrounding Areas:
Cover all the sofas, beds, furniture, and fixtures with plastic sheets to avoid accidental paint spillers. You can also use painter’s tape to hide the areas like windows and door frames for perfect edges.
Repair any Damage:
Before you prep to repaint you may see the damaged patches of paint on the walls. Inspect the surfaces for any imperfections like cracks and holes that are caused by water damage or harsh weather conditions. Fill them with spackle or putty. Then smooth it out by using a putty knife. Let it dry and then sand the patched areas until they are mingled with the surrounding surface. Gently sand the walls to slightly create a bit of rough texture. This will help you to adhere to the paint better. Using a sanding block/sandpaper with a fine grit will wipe away the dust with a wet cloth.
Prime the Surfaces:
If you’re switching to a different color it’s recommended to apply a coat of primer this will help the paint to adhere even better which will create a smooth finish.
Painting Supplies:
Grab all your painting supplies that are a must for your project, especially if you’re considering “Commercial Interior Painting Services” for a professional touch. Make sure you have all the necessary items and tools like paint brushes, rollers, paint trays, and paint. Make a checklist and tally it from there so you don’t panic during the process.
What equipment do you need to paint?
Now that your space is all prepped up, make sure you have all the painting supplies around you. You’ll need a few essential tools. Here’s a list to make the job easier for you.
Paint brushes: Several kinds of brushes will be required ranging from small to large. A 2-inch angled brush is best for edging and you need a large brush for larger surfaces. It depends on the details and areas.
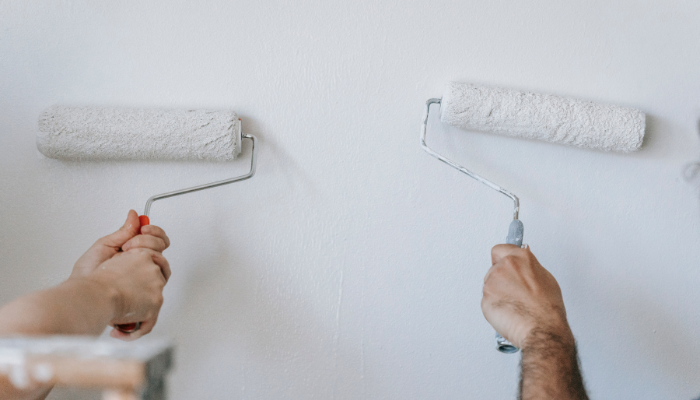
Paint rollers: A fun piece of equipment to roll over the paint on walls more evenly and smoothly. They are best for large areas and save you time too. Get fancy paint rollers to make the painting experience memorable.
Paint trays: To put your tools in while you paint, a paint tray is a must where you can put your painting tools and stuff. Use these to distribute paint for your paint rollers. Trays with liners are best for easy cleaning.
Plastic sheets: This is also very important as it prevents your furniture from getting damaged from paint splatters. Get white plastic sheets so that you can put the bleaching detergent if it gets and splatters.
Painter tape: This is essential to design a wall. You can mask off the area where you don’t want to put any paint and can create a design of your own. It also helps create clean, sharp lines.
Sandpaper or sanding block: You need sandpaper with medium grit, around 120 to 150. This helps to smooth out rough surfaces. It creates an excellent surface for the new paint to adhere to.
Primer, paint, and Paint stirrer: Get oil-based paints, and don’t forget to consider the finish whether it’s matte or gloss. Get a primer that matches the surface you will be painting. A handy paint stirrer is essential to mix paints thoroughly before their application ensuring consistent color and texture.
Wrap Up
Prepping for paint is a must as it ensures a durable and smooth finish. If prepping is done efficiently, you’ll achieve a professional-looking paint job that lives the longest and looks great. It’s surely worth the extra effort. Your paint stays looking fresh and vibrant. It ensures a smoother finish, better paint adhesion, and high durability. Without prepping before paint, your paint job can turn into a disaster. Improper prep work can create flaking, or peeling of paint from the surfaces. To avoid this from happening, it is advisable to smartly invest time and energy to prepare the surfaces for painting.

Leave a Reply